

Sourdough is the old-time bread: delicious, nutritious, and easy to make. So on-trend that even your barista will be left in awe at your yeasty adventures.
If you’re a millennial you’ll already be spending 50% of your salary on avocado on toasted sourdough, and as such will be familiar with its chewy texture and complex taste. This flavour is all the more impressive considering it’s made with just flour and water. Salt is often added, but it isn’t required.
How does it rise without bakers yeast? For that, we turn to our old friends: wild yeast and lactobacillus. These guys are already lurking in flour and the air you breathe, and all they need is an invitation to start a community that will happily power your bread booms.
Sourdough is healthy dough
Bread has an unjustified bad reputation in these carb-sceptic times, but sourdough is not your standard sliced loaf:
- Prebiotic benefits—the hard work of your baked bacterial friends mean that sourdough functions like a prebiotic, providing many of the benefits associated with fermented foods.
- Improved mineral availability—the lactic acid produced during the fermentation process improves the bioavailability of the beneficial minerals found in whole grains.
- Easier to digest—sourdough is easier to digest for many people. The fermentation process can break down gluten and other substances that commonly cause gastrointestinal distress. If you have a wheat or “yeast” allergy, sourdough may mean you can eat bread again. Hallelujah.
- Lower GI—sourdough is less likely to spike your blood sugar compared to a standard loaf, due to the way that the fermentation process alters the internals of the bread.
Check out Healthline’s review of sourdough bread for more on the nutritional intricacies of your future loaf.
Cheap n’ fun
It isn’t just healthy and delicious: making sourdough at home is very cheap, and you also know exactly what’s gone in: flour and water—no emulsifiers, preservatives, or sugars.
Sourdough is also fun to make! You will become the benevolent overload of a community of living organisms that spend their days recklessly bingeing, bless them. In doing so they will provide the expansive action required to make wet flour rise into glorious bread.
They will love you like a parent, and you will periodically plump up and sacrifice large segments of their population.
K.I.S.S.
There are a lot of complicated guides around for making sourdough bread. I’ve tried to distil the process down to the basics, with some pictures that will help you get an eye for it. There is no strict recipe for making sourdough—all the weights and quantities are arbitrary. But once you’ve done it a few times, you’ll get the feel for it and be able to improvise easily.
The following guide makes a style of loaf that I enjoy, but you can tweak nearly any part of the process to alter size, texture, taste etc.
Because you’re working with living cultures, every loaf you make will be different. Over time you will become more familiar with your microbial subjugates, and be able to produce better bread.
Before starting, you should at least be tremendously excited about sourdough. It is pure magic. Everyone has the opportunity to engage in this addictive alchemy that has been a part of our human history for thousands of years.
I will not wax lyrical any further, however, except to say that there is a profound joy in being able to make a staple such as your own bread and that I highly recommend you give it a go.
Let’s start(er)
There are two stages to making sourdough bread:
- Make the starter
- Use the starter to make bread
Once you have a starter going, it will keep in the fridge, and only need feeding once a week or fortnight. You can make bread from it whenever you want. It’s your equivalent of a packet of yeast, except much more rowdy and alive.
The starter is your community, and making the starter is a one-time process. Once it’s established, you can skip straight to the bread step whenever you like.
Make a starter
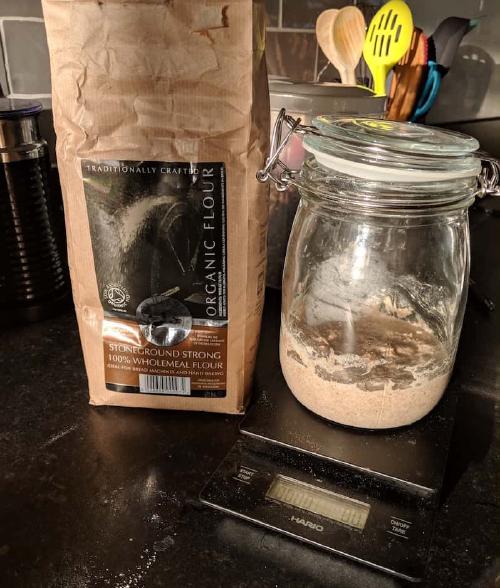
1. Mix equal proportions water and wholegrain flour in a jar
Use a good quality, whole grain, organic flour (Here’s what I use). This is the foundation of your community; don’t skimp. Wholegrain flour means more bacterial diversity to work with. Try 50g of water with 50g of flour. Once mixed together in a glass jar, leave at room temperature.
2. Are there bubbles?
Check over the next day or two to see if there are any bubbles in your mix. You may also notice the smell changing from wet flour to something funkier. The rate that bubbles appear is heavily influenced by the ambient temperature, so if it’s warm things will move along quicker.
If you can see some small bubbles forming, great news: you made babies. If not, something went wrong. Maybe you used poor quality flour or water with too much chlorine.
Bubbles mean that the magic has happened: bacteria from the air and the flour have begun to party on your flour, and it is now alive. However, they are short-sighted little buggers and will devour anything within reach, and then burn out. Your job as dictator will be to feed them when they crash and to harness their appetites for your culinary benefit.
3. Strengthen your community
While the bubbles indicate the presence of naturally formed yeast, your colony is still weak and naive to the ways of the world. There will be other bacteria present that need to be valiantly destroyed before your bread brethren can claim this sludge their own.
Add the same amount of water and flour as before (50g of each), and stir well. Wait another 12-24 hours, and check things are bubbling again. If you stick your nose into the jar it will hopefully smell sour and maybe a little fruity. Excellent. If it just smells like flour, it needs more time.
When you have more bubbles, toss half the starter away, and add the same amount of water and flour as before (50g/50g). This is essential to ensure that the yeast and bacteria are not just living off benefits, and are working hard to colonise the new inhabitants.
Repeat for 5 or so days. This will ensure the starter matures, and the right microbes are in charge.
To recap:
- Day 1—50g of flour, 50g of water. Mix and leave at room temp.
- Day 2/3—when bubbly, add another 50g flour & water.
- Day 4—toss half, add 50g of flour & 50g water.
- Day 5—toss half, add 50g of flour & 50g water.
- Day 6—toss half, add 50g of flour & 50g water.
- Day 7—toss half, add 50g of flour & 50g water.
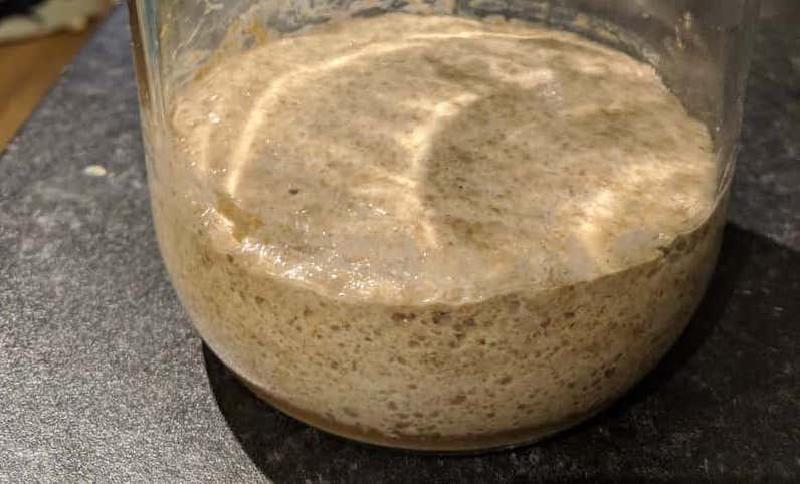
If your mix is regularly doubling in size, you have a mature starter that’s ready to use. You can put it in the fridge, or make bread immediately. You can also leave it at room temperature, but it will require daily feeding to prevent it getting rowdy and turning into an acid bath. Putting it in the fridge means the community grows in slow motion.
If you read other articles, you will find a thousand variations on the process of making a starter. The basics are really simple: flour + water. When it bubbles, get rid of some and “feed” it. Repeat.
Make bread

1. Make a sponge.
To make a loaf, we need to scale things up. A “sponge” is basically a bigger version of what you have in your jar. It allows your wild yeast to grow and colonise en masse.
I usually do this before bed, so it can rise and bubble overnight.
Pour your starter into a bowl. Add equal amounts flour and water. I usually go for something like 250g of flour, 250g of water. I use some wholemeal, but the majority white bread flour. You can use wholemeal only, but it will not rise as much and will produce a denser loaf. It will still be delicious.
Remember to “refresh” your starter after you’ve used it! Even when you use most of it, there will be enough stuck to the sides to keep the community alive. Feed it water & flour, and put back in the fridge. It will then rebuild in slow motion, ready for your next loaf.
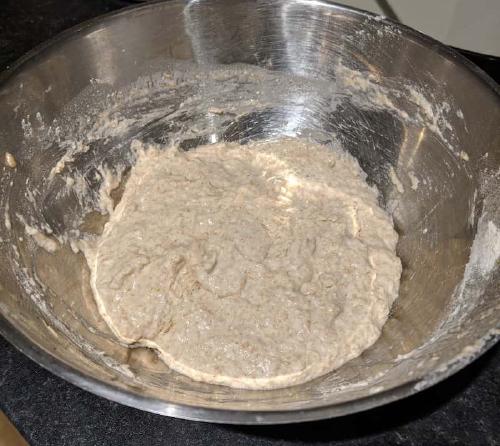
Here’s the “sponge”, right after mixing:
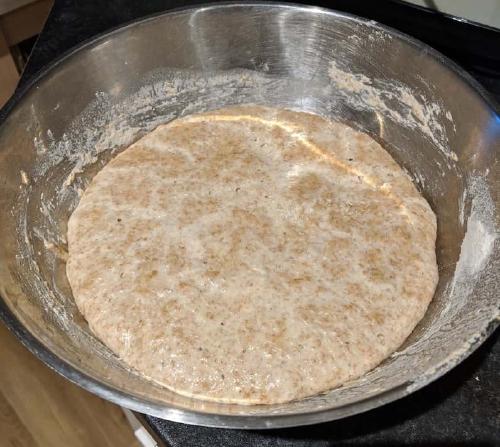
And then the morning after, bloated with bubbles and some browning on top:
2. Add more flour and knead
Now that your yeast buddies have ravaged their new food source, they are ready for the final stage. This time, we want to move from wet sponge to dough, so we’re mostly just adding more flour.
Dump some flour into your bowl and mix it in with a spatula so that the mixture becomes less wet. When it looks like you could pick it up, pull it out of the bowl and on to a floured work surface, and sprinkle some salt in. This is optional, but highly recommended to improve the taste.
Begin to knead. Push and fold, push and fold, for a few minutes, until it bounces back when you prod it with your finger.
If it’s sticky, keep adding flour. If it’s really tough, prod it and add some water until it’s more pliable.
When you have a nice dough push it roughly flat with your knuckles, and then roll it like a swiss roll, so you have a somewhat even rectangular blob. Put the blob into a lightly oiled, floured bread tin:
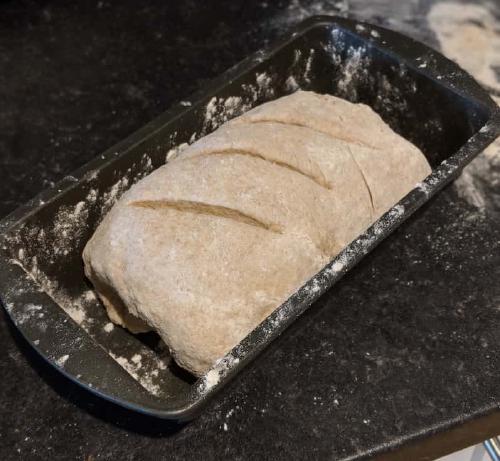
Cut some lines in the top, to ensure that anyone looking over your shoulder thinks you’re a master baker. This will also help the bread expand more easily.
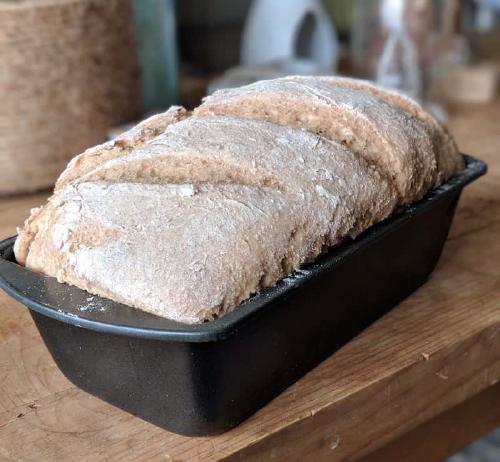
Now leave it for the final proof. Your bread buddies will embark on their Last Supper. The bread will rise and hopefully fill the tin, potentially even spilling over the edges like an optimistically-dressed party reveller.
After 6 or so hours, it should have expanded quite a bit:
3. Bake it
Put it in the oven at 190-ish degrees Celsius, for about half an hour. Check before the end and take it out early if the top is catching. If you added quite a lot of wholemeal flour, your cooking time could be quite a bit longer (more like 45-60 minutes)
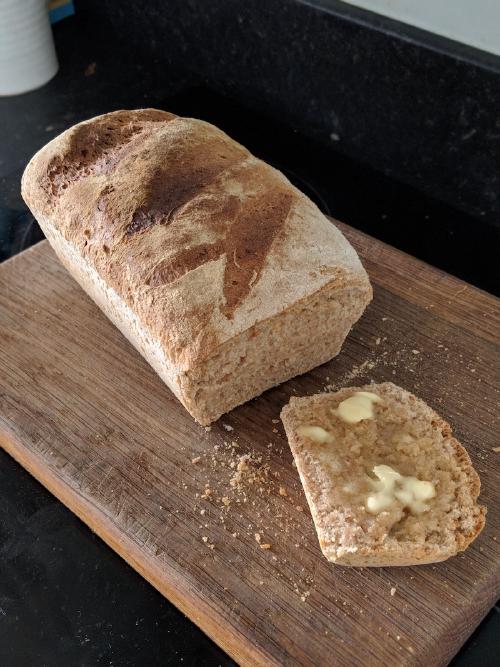
Once cooked, remove from the oven and turn the tin upside down to empty it out. Hold your loaf and tap the bottom: if it sounds hollow, it’s cooked. You can nod smugly at any onlookers, and smile approvingly.
That’s it! Apply butter liberally and enjoy.
Are you bready?
Sourdough is a bit of an art. You’ll get better with each bake, and start to understand the nuances of how temperature affects the rate of rising, and how different flours shape the rise and texture of the loaf.
Despite the infinite variations, the basics are incredibly simple: feeding your flour and water community so that it booms and rises at the right times.
Sourdough also freezes really well. If you’re like me and you can’t have fresh bread around without incorporating it into every meal, then freeze it. I slice mine first, and then just take a slice or two out when I want it, and pop it in the toaster.
Fin.
Hey you.
Interested in inner work, wisdom and learning?